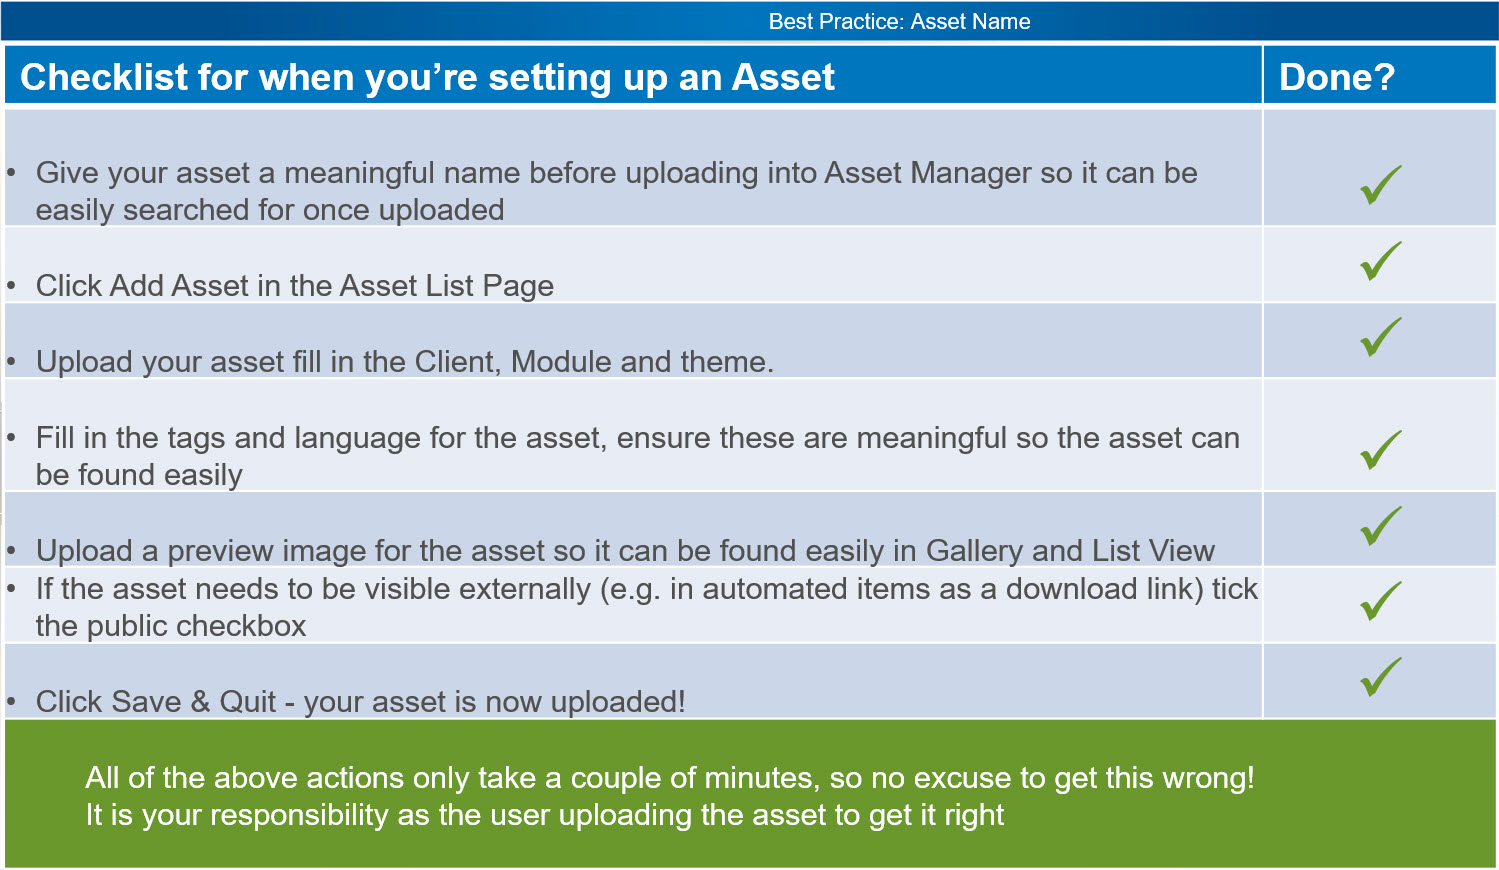
Adding a new Asset
Add an Asset
Click 'Add Asset' this will take you to the 'Asset Details'
- Click 'Browse' button to add an asset file
-
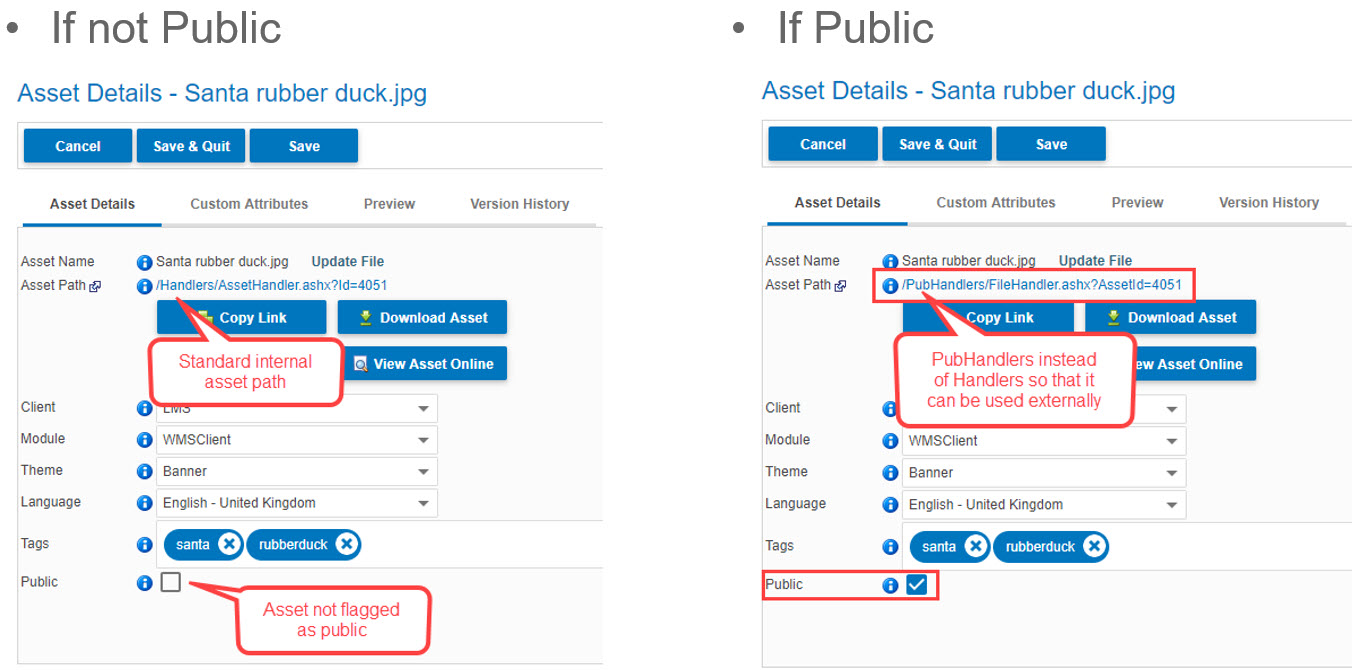
- The Asset Name & Path will display automatically
Click 'Add Asset' this will take you to the 'Asset Details'
* Note: you can change the asset e.g. browse for a new image without the path name changing – this is very useful if an asset is enhanced/improved and the link/embed code is already in use. Only the asset will change, you do not need to go back to all places on the WebPlatform to change link/embed code.
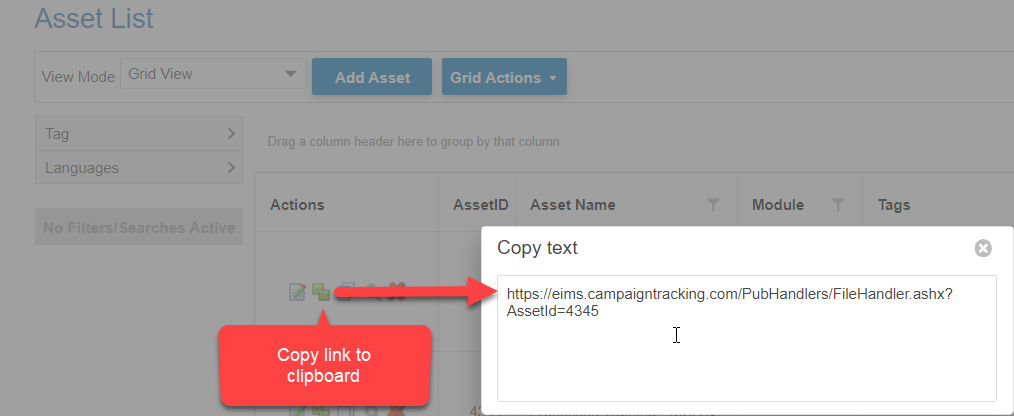
Disclaimer: If you use a link that is not public then only user with a WebPlatform login can access the asset
How to use a Link
e.g. https://qa.campaigntracking.com/Handlers/AssetHandler.ashx?Id=3340
In Form Designer/Automated Email/Help/CMS Control etc
This is how this form will look to a user
Disclaimer: If you use a link that is not public then only user with a WebPlatform login can access the asset. In this example I am using a public asset.
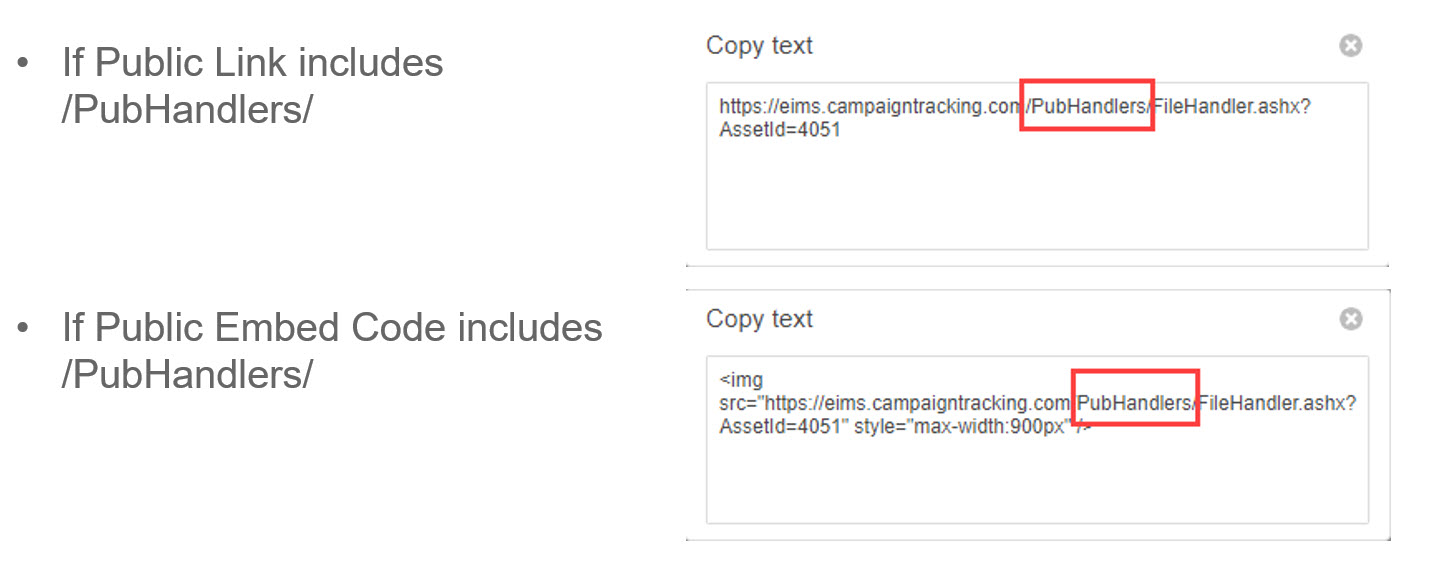
How to use Embed Code
<img src="http://eims-uat.campaigntracking.com/PubHandlers/FileHandler.ashx?AssetId=3026" style="max-width:900px" />
In Form Designer/Automated Email/Help/CMS Control etc
Please note that Embed Code only works in HTML and you need to have HTML knowledge to use it properly
This is how the asset looks
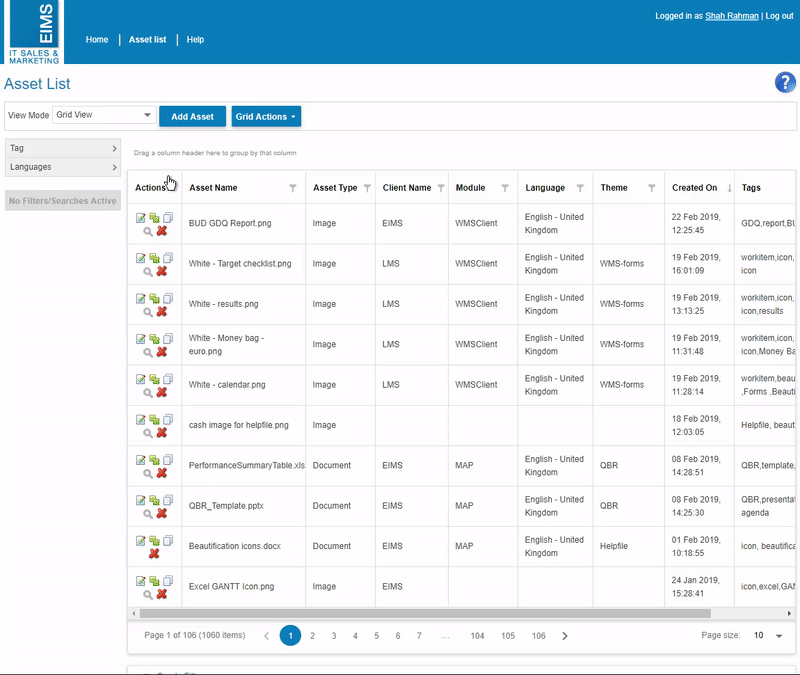
There are a few actions that can be taken from the grid or from within the asset details page. See examples below: