menu

WebPlatform Documentation

Clients

Standard Users

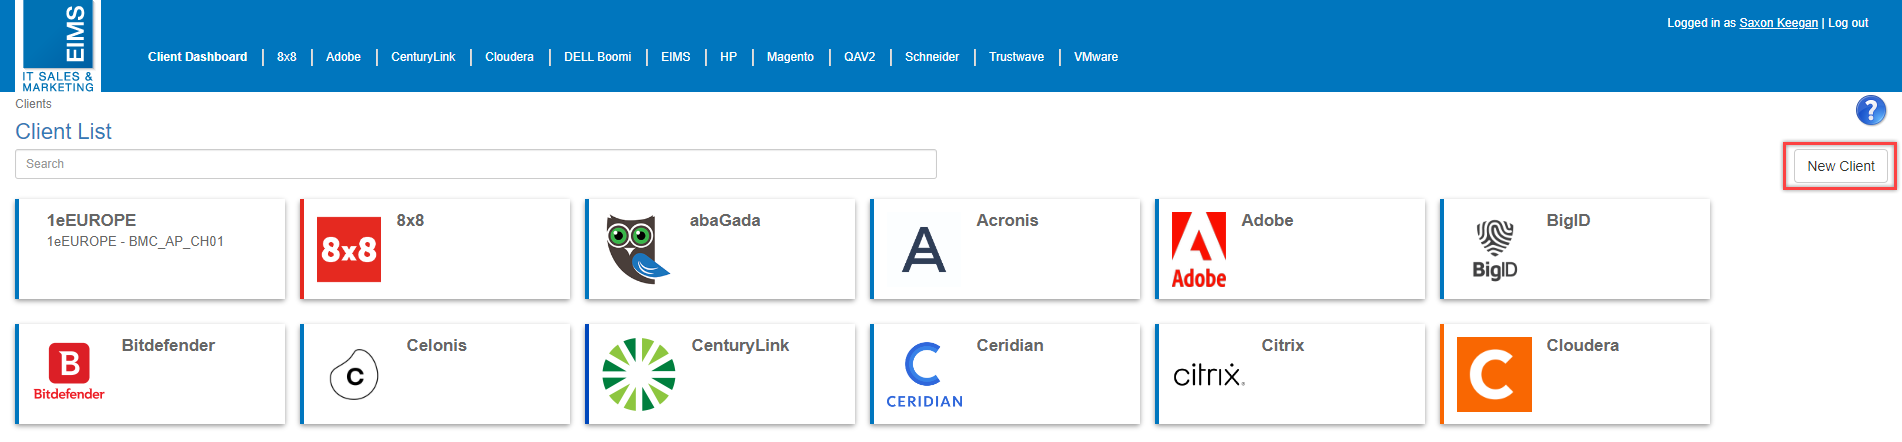
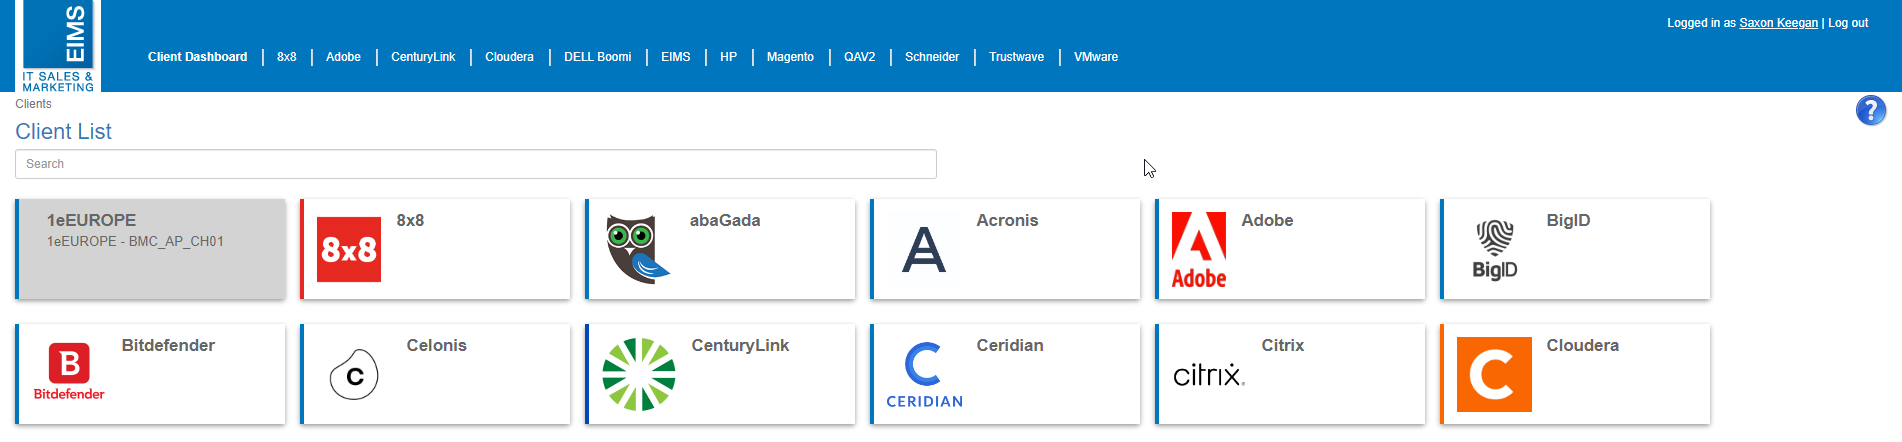
The Client List is the first page users land on when navigating to the Campaign Dashboards module. All current clients are visible on this page and displayed as individual tiles. Standard users will not be able to click on clients they do not have permission to access. Clients a user cannot access will appear with a grey background.

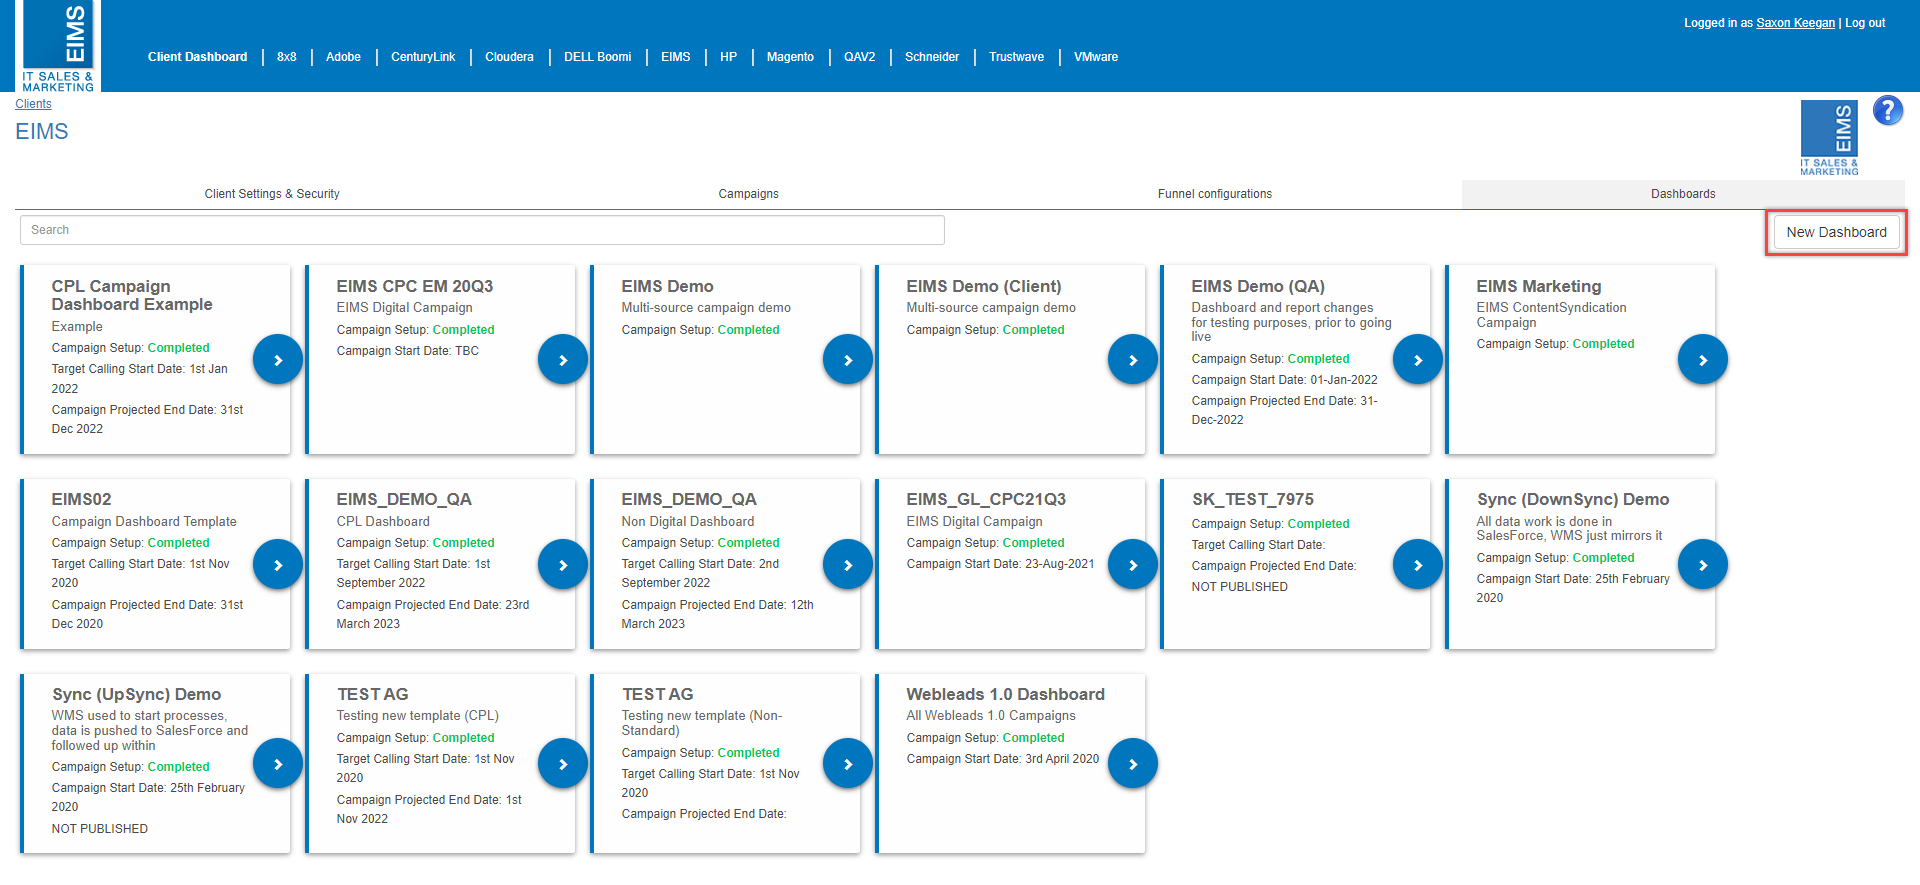
Standard users will be taken to the list of client dashboards when clicking the client tile. Only dashboards that have been published and the user has permission to access will be visible on this page. 

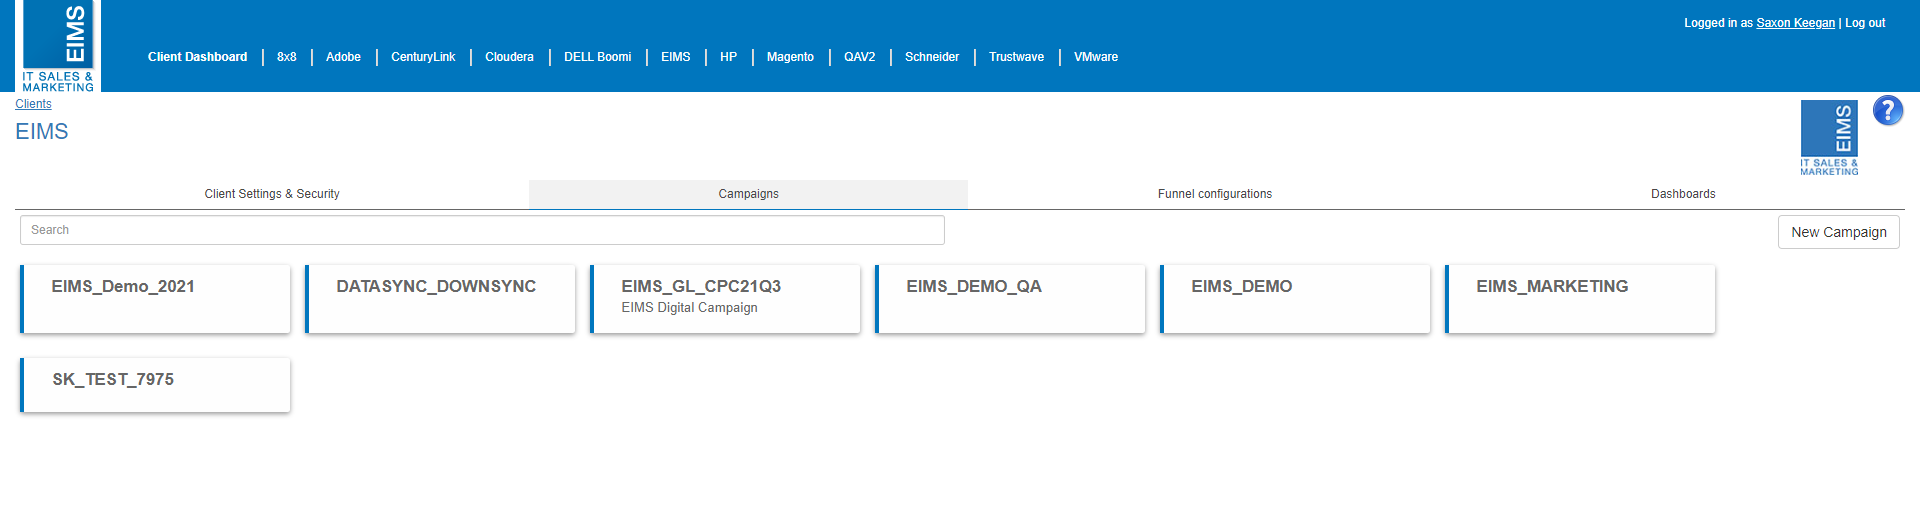
Dashboard tiles display the dashboard name, description and meta data (campaign setup status, start and end date etc...). To view a dashboard click the tile of the relevant dashboard.

Admin Users

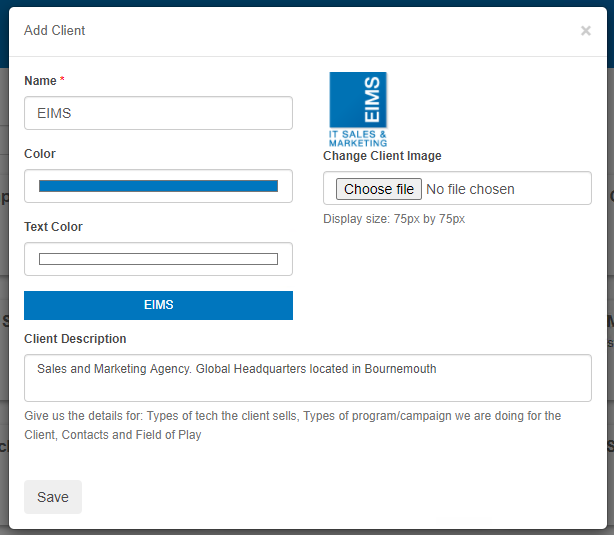
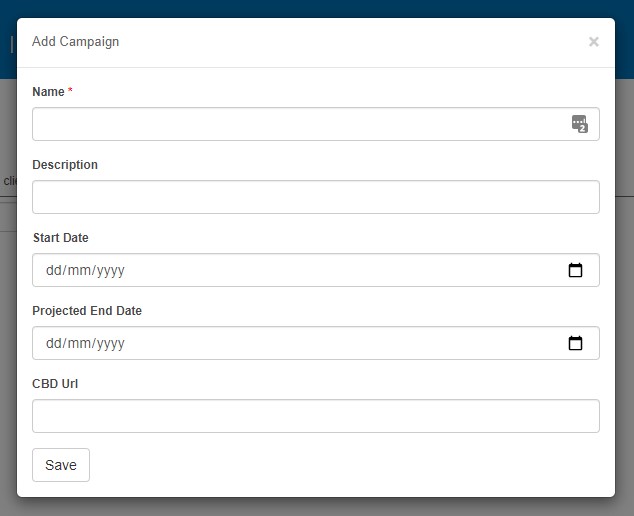
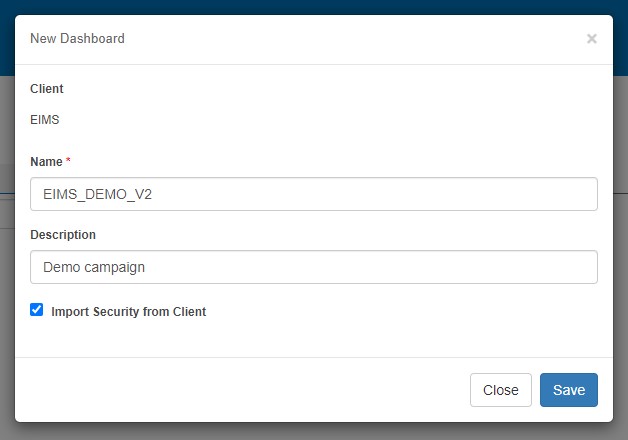
Campaign Dashboard admins have a different user experience to a standard campaign dashboard user as they have additional options for configuring a campaign, dashboards, reports, and processes.

Adding a new client

In the top right corner of the client list page is the "New Client" button. The button will open a pop up window where you will need to provide the following information:

  • Client Name - The name of the new client
  • Add Client Image - A file uploader to display the clients logo. Has a display size of 75px by 75px.
  • Color - The primary colour for the client. This will be used to theme the clients dashboards and the client sections of the "My Dashboards" and "Client Dashboard" pages. You can select the colour from a standard colour picker however, we recommend using the RGG/HEX values to apply the clients colours accurately. 
  • Text Color - Sets the colour of the text for client specific headings and cell titles.
  • Client Description - The description for the client

Digital admin users can manage client campaigns and dashboards by selecting the client from the client dashboards page. Each client has 4 tabs; Client Settings & Security, Campaigns, Funnel configurations, and Dashboards.

Client Settings & Security

The client settings allows you to make changes to the client details that were setup when creating the client. This includes Name, Color, Text color, description and Client logo.

The security settings (below the client settings) allows you to control who can access the the current client from the client dashboards page. 

Access can be given to individual users and user roles. Users and roles who currently have access will appear in the right hand boxes labels "Added".

Adding and removing access to the Client

To give a user/role access to the client click the name within the box labelled "Available" and you will see the name selected move into the "Added" box. To find a specific user/role begin typing into the search field above the relevant "available" box. The list will actively reduce as you type.

To remove access click the name within the box labelled "Added" and the name will be removed from the box.

Changes made to the security for the client are immediate and do not require a save to be made.

Campaigns

Campaigns tie together the various parts that make up the campaign dashboards and campaign Power BI reports. To learn more about setting up a campaign, see the Campaigns Documentation.

Creating a Campaign

When a client is selected, a campaign can be created from the Campaigns tab. Click the "New Campaign" button in the top right corner, this will display a dialog box.

The dialog box has 5 fields to capture basic information before creating the new campaign. The name is mandatory and must be provided however, the remaining information is optional:

  • Description - A description for the new campaign.
  • Start Date - The date that the campaign will start, this is used within the funnel report and will be displayed on any connected dashboards
  • Project End Date - The date the campaign is projected to end, this is used within the funnel report and will be displayed on any connected dashboards
  • CBD URL - The link to the Campaign Briefing Document (CBD) for the campaign. This should be a link that can be embedded into the dashboard (how to embed Google Docs). 
    • For Digital type campaigns, ensure this field is populated, as it is used to populated the Campaign Briefing Document Tile

Funnel Configurations

Funnel configurations are an important part of the campaign setup and can be viewed from the Funnels tab. The funnel configuration is the backbone of the Campaign Funnel Report as it defines the sales funnel stages and how they map to each other for EIMS, the client, and Sirius.

the funnel configuration is also important for CPL campaigns as it contains details of how much a lead costs from all the publishers for the campaign.

A tile is visible for each funnel that exists for the current client.

If a funnel has been set as the client template, the text "CLIENT TEMPLATE" will be visible below the funnel description text. The client template is used when creating a new funnel.

If a funnel has been set as the global template, the text "GLOBAL TEMPLATE" will be visible below the funnel description text. The global templates is used when creating a new funnel and a client template has not been set.

To learn more about funnel configurations see the Funnel Configuration Documentation.

Create a New Funnel

A New funnel can be created for the currrent client by clicking the "Create Funnel" button in the top right corner, this will display a dialog box.

The name field is mandatory however, this will be prefilled with the name of the campaign. Typically, you should not change this value to ensure that the data tables generate correctly.

The description field is optional; a short description of the funnel should be entered here.

The "Global template?" checkbox will set the new funnel as the general template across the module. This means any funnel created for a client that does not have a client template set will use the configuration setup in the selected funnel.

The "Client template?" checkbox will set the new funel as the template for the current client. This means any funnel created for the current client will use the configuration setup in the selected funnel.

Once your happy with the details, click the "Save" button.

Dashboards

From the dashboards tab a user is able to see all the dashboards created for the client. Each dashboard tile incldues the dashboard name, description, meta tags and the text "NOT PUBLISHED" if the dashboard has not been published. Admin user can view and edit all client dashboards.

Create a New Dashboard

New dashboards can be created by clicking the "New Dashboard" button, this will display a dialog box.

At the top of the window shows the client the dashboard will be created for and below is the Name field (mandatory) and the description (optional).

The import security from client checkbox will assign the same users/roles applied to the current client to the new dashboard.

help_outline
close