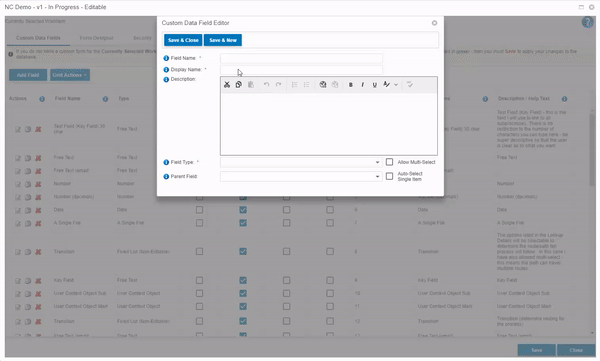
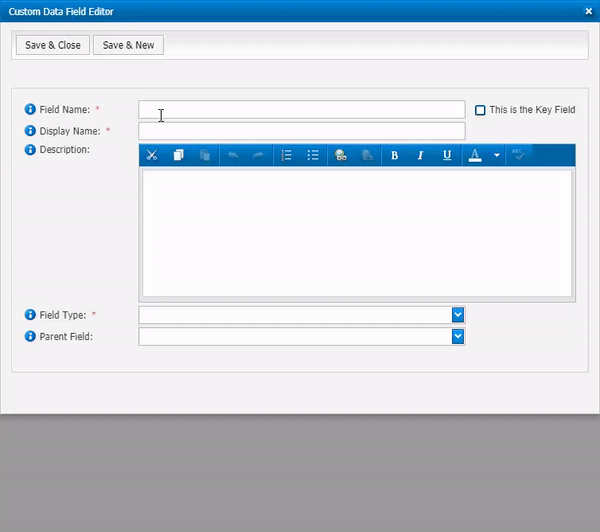
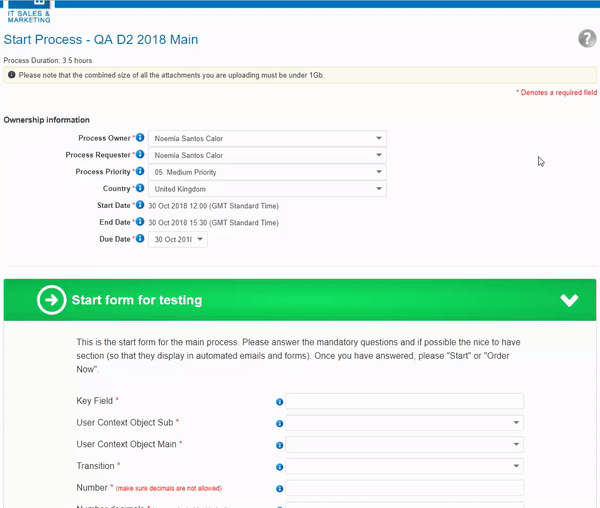
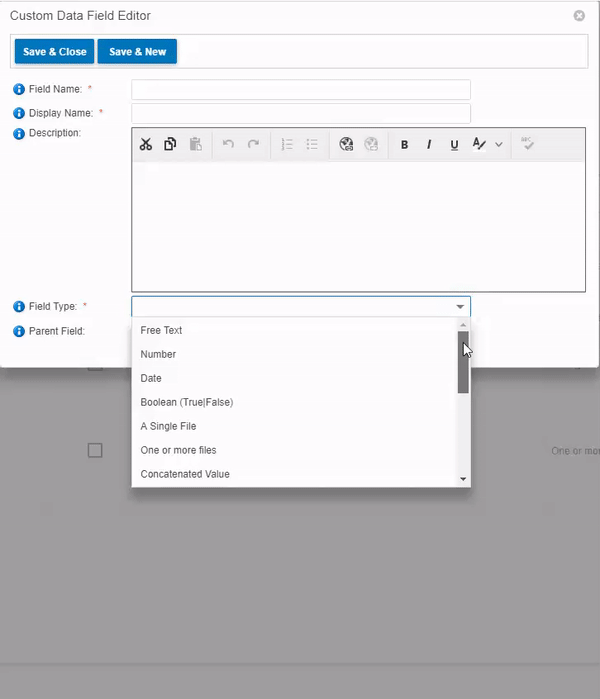
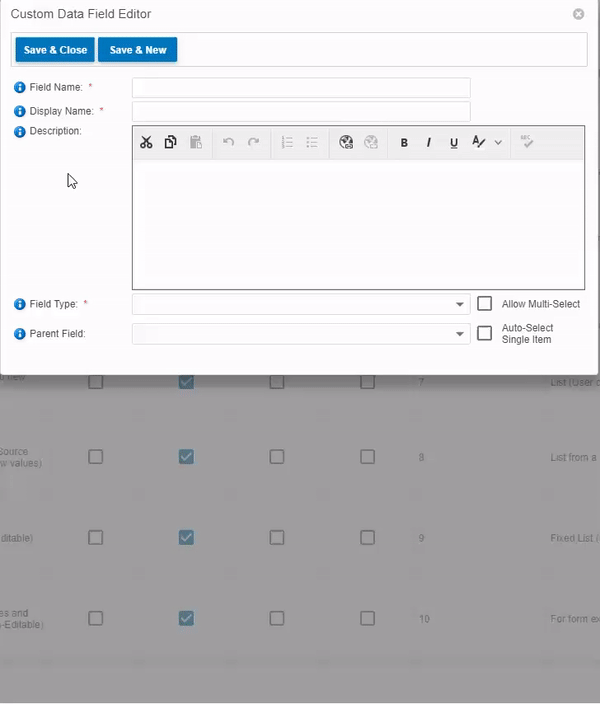
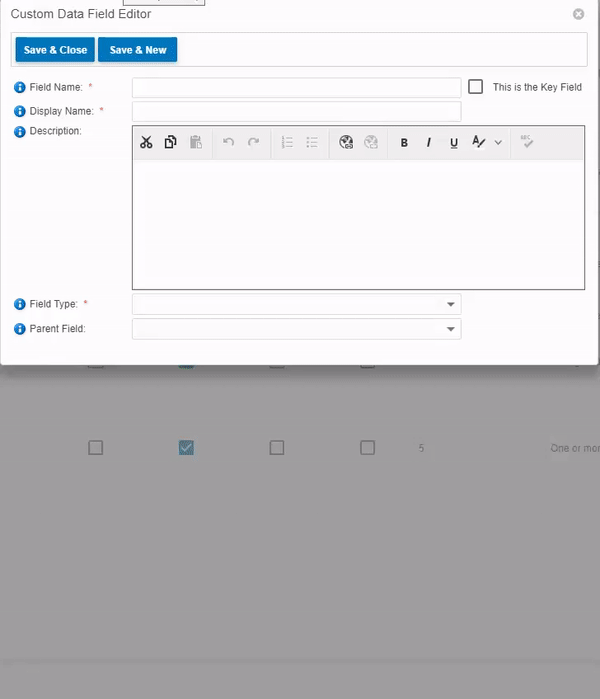
All Field types available for use & how to set these up
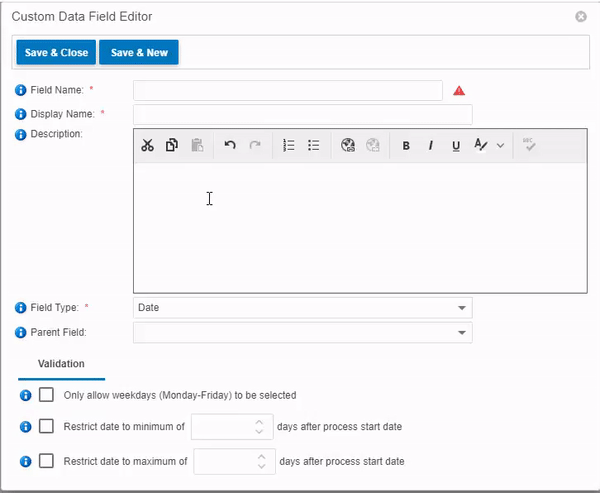
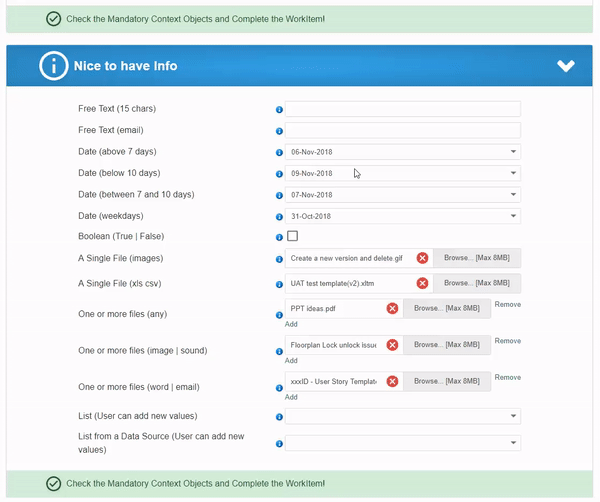
- Date:
- No restriction = any date value
- Weekdays
- Above a set number of days
- Below a set number of days
- Between a day range
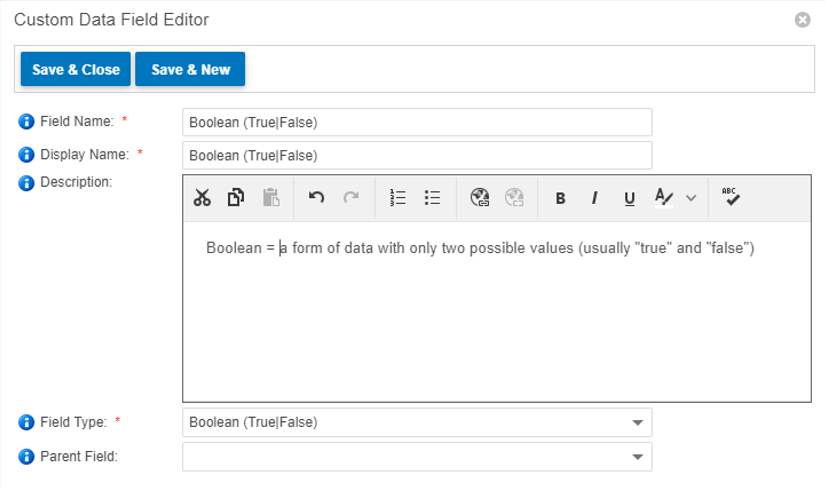
- Boolean Value (True / False)
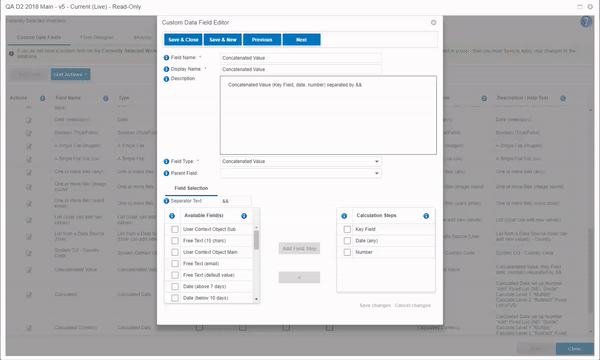
- Concatenated Value
- List (User can add new values)
- List from a Data Source (User can add new values)
- Option available to Save Permanent Values to a database (WMS Custom data store)
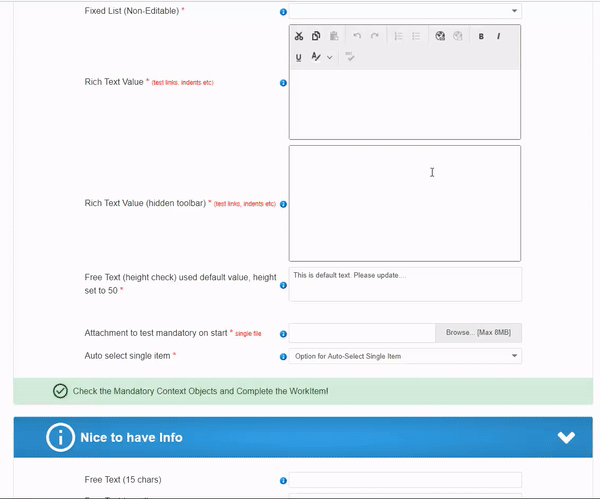
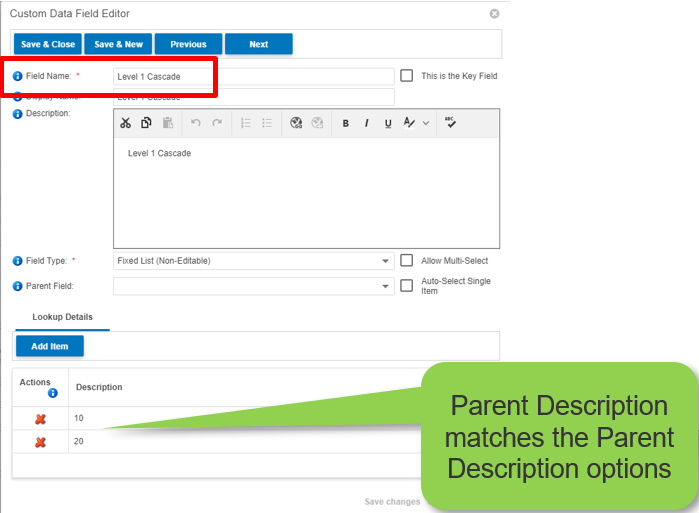
- Fixed List (Non-Editable)
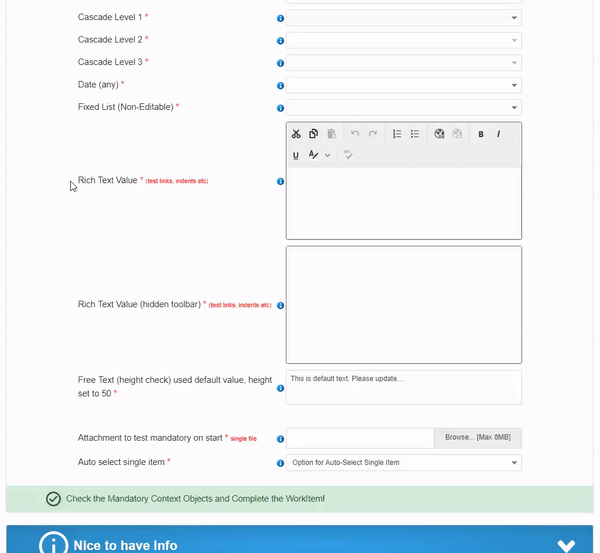
- Option available to Auto-Select Single Item
- Fixed List of Values and Descriptions (Non-Editable)
- Option available to Auto-Select Single Item
- Fixed List from a Data Source (Non-Editable)
- Option available to Auto-Select Single Item
- Number:
- No restriction = any integer
- Option available to Allow Decimals
- A Single File
- No restriction = any format accepted
- Restricted format selected from validation list. Selectable formats:
- Comma Separated Text File
- Outlook Email Message
- Word Document
- Word 2007 Document
- Adobe Acrobat Document
- PNG Image
- Postscript File
- GIF Image
- WAV Audi
- JPEG Image
- MP3 Audio
- MP4 Video
- Excel Spreadsheet
- Excel 2007 Spreadsheet
- Excel Macro-Enabled Template
- One or More Files (same settings as A Single File except for it accepts multiple files to be uploaded)
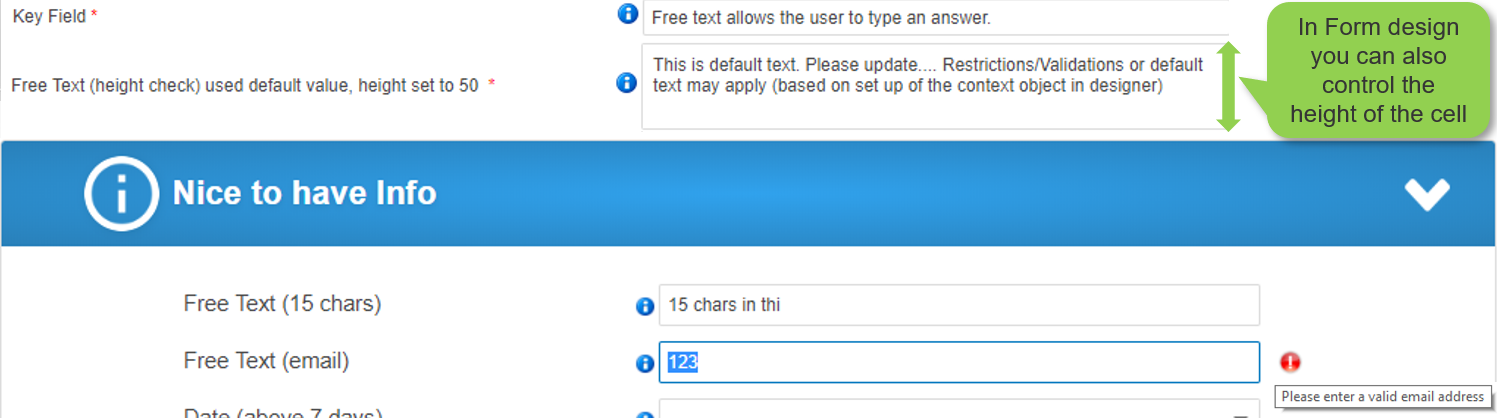
- Free Text (Note: if you need to map a phone number to another system set it up as free text)
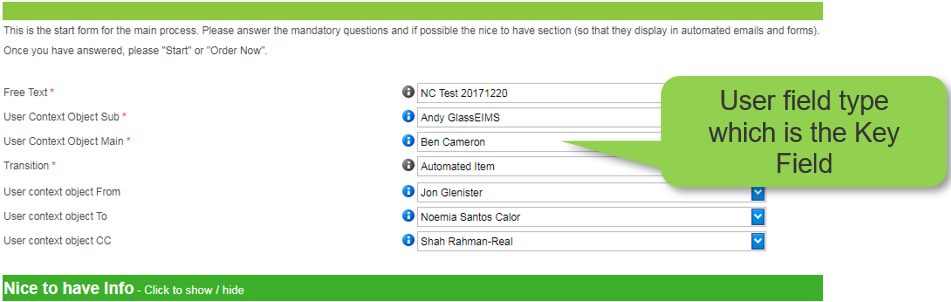
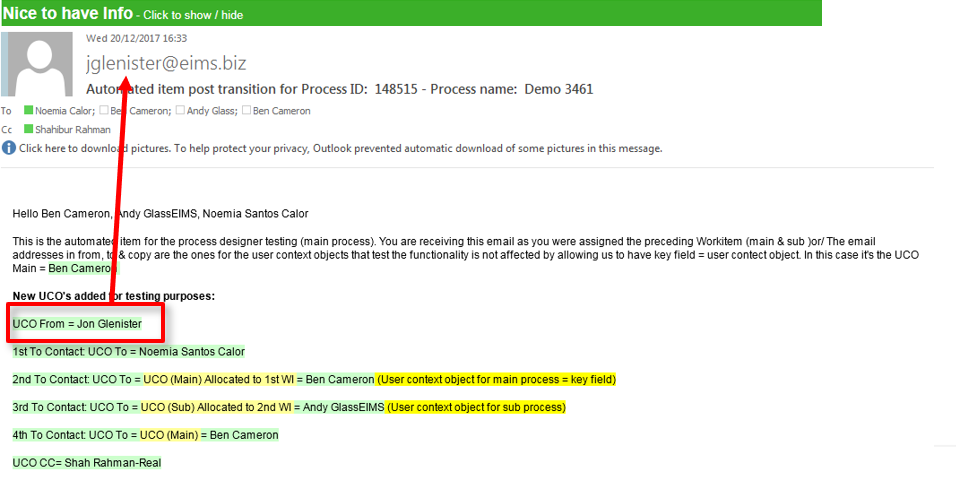
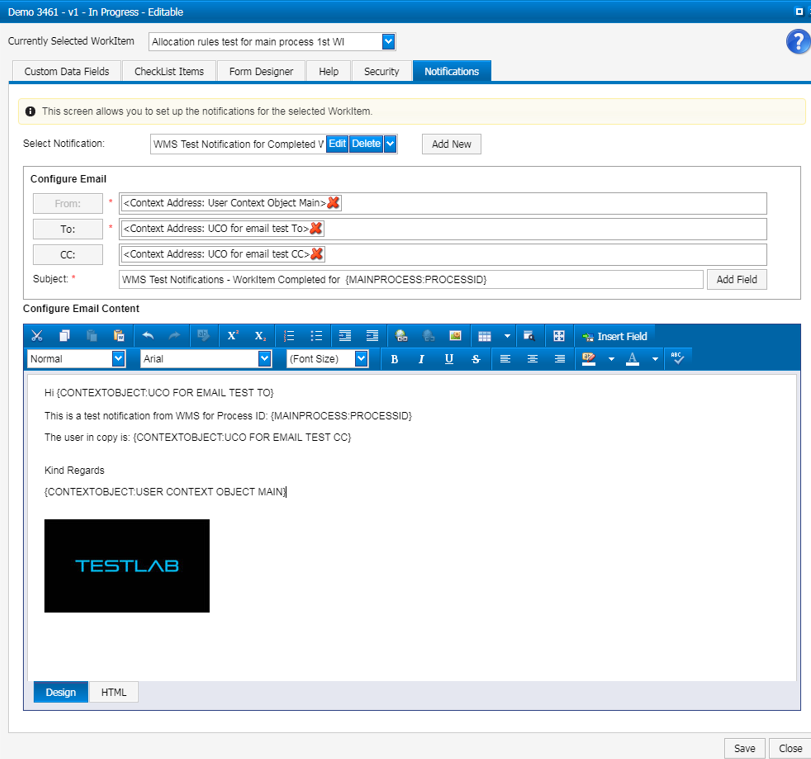
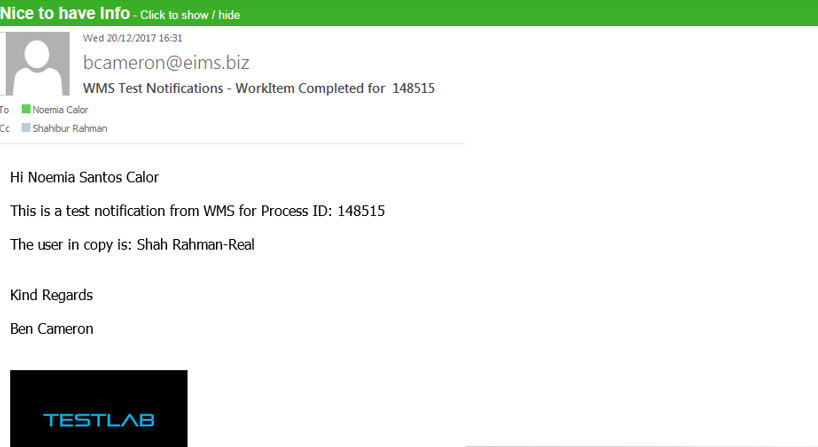
- System Context Object
- User Context Object
- Option available to Auto-Select Single Item
- Rich Text Value
- Option available to hide the toolbar
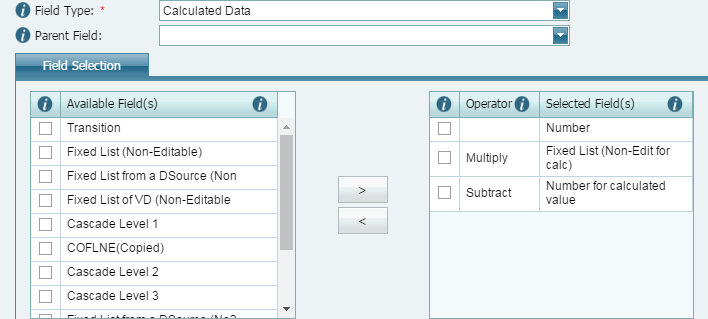
- Calculated Data