menu

WebPlatform Documentation

Process validation & Cut Live

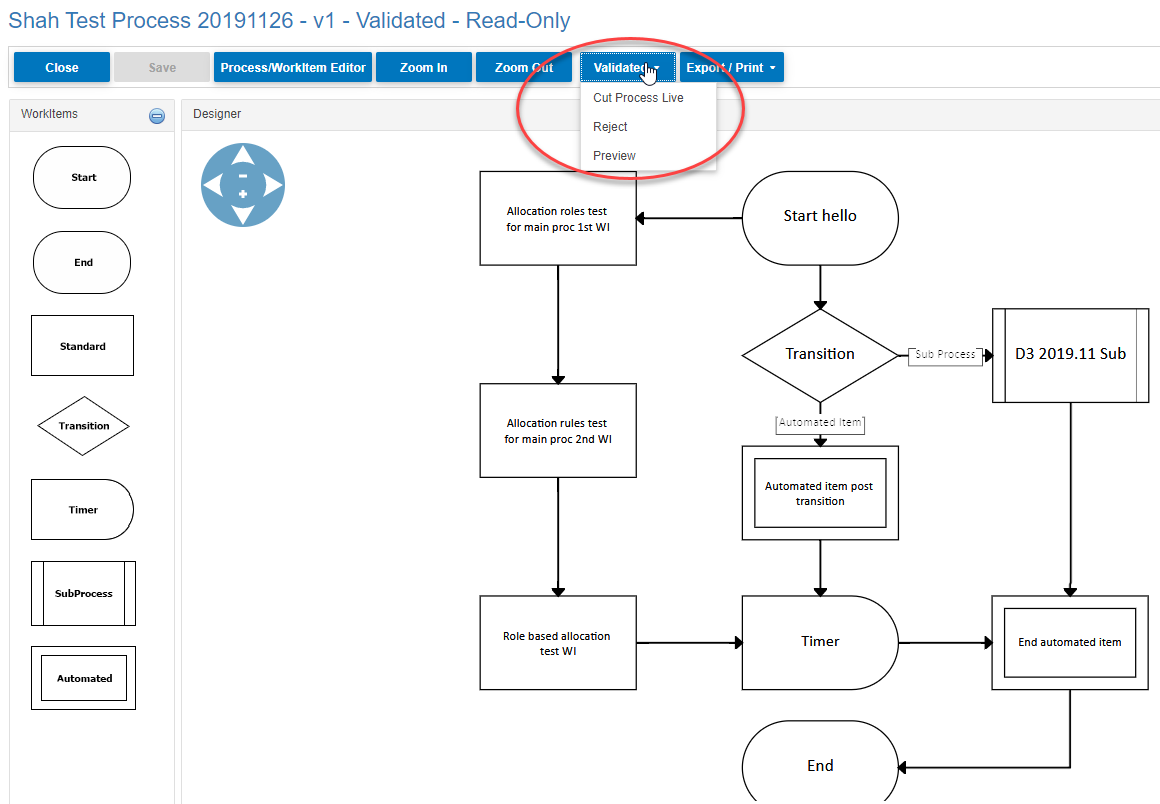
How to… validate your process & cut live!

The next step when you have your process designed is to Validate it

  • Click on Validate Process
    • The validation page will load.
    • You will see listed the basic automated validations that the system will check the process for
  • Click Start Validation
    • Validation Statuses displayed
      • Pass
      • Fail (If a fail occurs the system will guide you to where the issue is, just read the message)
    • Click Close (either to fix a Fail or move on to Cut Live)

Checkpoint: The process status will have changed to Validated in the header of the page you are on & also in the Process List grid

Reject validation without going to Process List

Post validation a designer can:

  • Cut Process Live, Reject and Preview without leaving the page

Once the process status is Validated, all further actions can be taken from this combo-box (highlighted in the image)

Cutting your process ‘Live’

Once your process is Validated the next step is to cut it live. You can do this from:

The process list grid

  • In Actions column click on the ‘Cut Process Live’ icon
  • Prompt will appear: Are you sure?
  • Click OK

The Designer page

  • Click on the ‘Cut Process Live’ button
  • Prompt will appear: Are you sure?
  • Click OK
  • The Process status will change on the page
  • Checkpoint: Close & see status updated to Current in Process List grid

Publish to Storefront for Current (Live)

Once a process has status of Current Live it can be linked to a storefront service

  • This can be done in Storefront/ Service Admin or directly in designer.
    • SelectPublish to Storefront’
    • Fill in the detail for the Service
      • Pre-populated: Name & Short Description (carried over from designer)
      • WMS Tab hidden
    • Edit the landing page
  • Order the service to further test your process
help_outline
close